Sunday, December 21, 2014

Amrezy... Oh my gosh!

The most amazing thing happened over on our Instagram page this past week. Amrezy, a highly known beauty Instagram'r liked and commented on one of my photos on Exquisite Glow! I had such a fan girl moment and could not believe it. It all started with this quote she posted on her Instagram account, "I love girls who compliment other girls. Too many girls thinking its a competition these days. Its nice to be nice." Naturally I commented saying how it is nice to be nice and that I like to leave compliments on peoples photos because I know how Good it feels to read them when they are given to me. If I can make someone feel good by me saying something nice then why not? It doesn't cost me a dammed thing. The next thing I know I see a comment on my feed saying the "Look the Queen Commented." I brought up the picture and sure enough Amrezy had placed a comment on my picture, "Beautiful." My did so many Cartwheels in my head it was Cray! It made my day and I can't tell you how good it made me feel. I'm sure you can tell that I have not posted much on the blog as of late, and its because I have been going through a hard time and adjusting to recent changes in my career. Right now I am trying to figure out what my plan of action will be for the next few weeks. So understand that this was a much needed burst of happiness for me and I just wanted to share my good feeling. Kindness is the best gift you can give someone so be kind. More comes to people who are kind because they are happy people. Mean and negative people might have luck here and there but whats the point of that if they have all that aggressiveness and tension. That's not happiness. 
So I leave you with my screen shots of the Amazing Instagram Moment I had. I hope you enjoyed this post and took a little something with you from it. 


Do you have a Instagram account? Leave me your user name below so I can check out your Photos. Or head on over to my Instagram account and leave a comment on a photo letting me know you came from my blog. http://www.instagram.com/exquisiteglow/  

-Alejandra

Friday, December 5, 2014

MAC Objects of Affection | Lip Glass Haul


So as you can see we went a tad Cray over this years Holiday Collection at MAC here at Exquisite Glow. Not only did we obsess over the Objects of Affection Collection, we also ventured out to a few other products we've had our eye on and thought this was the time to bite the bullet and splurge. 

We are going to start off with the Lip Glass Sets because they are such an amazing deal we want you to get your pretty manicured hands on them before its too late. We decided to go ahead and get all three of the Lip Glass sets because they carry A LOT of the colors from their permanent collection. So we figure we could not pass this deal up. 

A regular Cremesheen Glass comes with 2.7g/0.09 US oz. and a regular Dazzleglass comes with 1.92g/0.06 US oz each run $20.00 . While in the kit the Cremesheen Glass comes with 2.4g/0.08 US oz. and the Dazzelglass comes with 2.4g/0.08 US oz. each set comes with THREE Cremesheen Glasses and ONE Dazzelglass for $35.00 All colors marked with an (*) are part of the permanent collection. 


  • Stately Shimmer - is a warm peach nude with light peach golden shimmer.
  • Fashion Whim* - is a light beige with a light shimmer. (Shimmer is almost non-existent)
  • Rising Sun* - is a frosted bright orange in the tube but can be applied sheer.
  • Courtly Coral (Dazzelglass) - is a neutral clear gloss with tons of purple and gold reflects of fine sparkle.


  • Paper Lantern* - is a frosted soft warm pink. Kind of translucent but leaves a beautiful finish.
  • Dynasty at Dusk* - is a frosted neutral pink. It is defiantly more opaque and can be worn alone.
  • Deelight* - is a mid tone neutral. I see more mauve in this color and no shimmers.
  • Love Alert* (Dazzelglass) - is a raspberry red with red pearl. The red pearl are micro shimmers, beautiful. 


  • Fashion Scoop* - is a clear pink with micro silver sparkle. 
  • Pagoda* - is a frosted cool pink. 
  • Loud & Lovely* - is a blue pink with no trace of shimmers.
  • Rags to Riches* (Dazzelglass) - is a plum pink with teal & red/pink pearl.
These glosses are great to wear alone or over your lipstick to give it a little extra something. 
Which one is your favorite? Make sure to pick up one of these boxes for your self or as a gift for someone special. You can also buy them and use the glosses as stocking stuffers for multiple friends. We are so excited to play around with these we just can't handle it. 
Make sure to keep an eye out for our upcoming pigment sets post. Those are our favorite! 

Happy Holidays Gorgeous,

Exquisite Glow

Thursday, October 23, 2014

Grow Back Those Nails Girl!


The relationship between my nails and I is a real complicated one. I have always been a nail bitter and to tell you the truth I believe I will be for the rest of my life. However I am able to train myself (at least for a little while) not bite and grow them out for a few months. I say this because year after year I grow out my nails and then for some reason (usually nerves) I take up biting again. Its a cycle.

So today I want to share with you what my nails can look like when they are beat up. Yes BEAT UP. Also I want to go over what products I use to help me grow my nails back long and strong. Currently as I write this Blog post I am on week two of treatment. As time goes on I will be adding pictures to this post to update you my nails progress.

Week One (last week)


Week Two (Today)


When I prep nails for regrowth the first thing I do is give my self a manicure. As painful as it is when my nails and fingers are at week one's state it is necessary to start off with clean smooth looking nails.  I use Sally Hansen Instant Cuticle Remover Maximum Strength to clean up my cuticles and maximize my nail bed area. I proceed by using a nail buffer to smooth out my nails and get rid of any ridges. To feed my cuticles some hydration I give my nails a drop of Sally Hansen's Vitamin E Nail and Cuticle Oil. I like to message the oil into my fingers for a few minutes. After my cuticles feel soft to the touch I then wash off the oil with some soap and warm water. After my nails dry completely I use OPI's Nail Envy's Original Formula to apply two coats on my nails. The instructions on the product instruct to reapply the polish every other day and after a week remove it completely and start the process over again.


Another product I use to help is -ibd- RECONSTRUX. I apply this solution to my nails in the morning and at night before going to bed. This helps to Rebuild and Renew Nail Growth in 30 Days, it enhances nail growth, strengthens weak nails and renews damaged nails.
The last product I include in my nail regrowth process is a dietary supplement, Biotin. Biotin helps promote the health of skin, hair and Nails by nourishing cells throughout the body. I intake two to three capsules a day when I'm regrowing my nails.

During these periods of insane nail biting I have to keep my fingers out of my mouth because they just seem to end up there some way or another while watching TV. So to avoid that I use my Aloe infused fuzzy gloves while watching TV. I do that for the duration of the nail treatment and by the end of it the habit is dropped (until the next set of nerves strike).

Keep checking back for my weekly nail growth updates. I hope you enjoyed this post and that is was informative and helpful. Please let me know if you suffer from nail biting and what tips and tricks you use to help yourself out in the comments section below.

-Alejandra

Monday, October 20, 2014

Eyebrow Tutorial | How to Fill in the Brows


Today we wanted to share a quick and easy how to tutorial on how to fill in the Brows. Follow these five easy steps to shape your eyebrows. As you can see in the picture above we will be directing this how to using Anastasia's Dip Brow Pomade. Lets get right into it.


The first thing to do is brush the brow hairs into place using a brow comb, brush or spooled. If you need to cut any to they don't fall to out of place go ahead and do so. 


Here we will be mixing two of our dip brow pomades to achieve the desired shade. Unfortunately at the time the shade taupe was not out for sale so we came up with a way to get the color as close as possible.


Then using an angled brush start off by outlining the bottom of the eyebrow. This will help create the shape of the brow you want. 


Next start filling in the brows using upward strokes lightly. However if you go overboard and over fill don't worry the next step will take care of that. 


Next using the Spooley brush out your brow hairs to evenly distribute the product and diffuse the harsh lines.


The last step to all this HARD work is keeping the brow hairs in place. You can use a wax or gel. We personally prefer to use a brow gel. We like using Anastasia's clear brow gel. 


So this is how we like to fill in the brows using the brow pomades. The nice thing about these pomades is that they are long lasting. So far this product has been better than any other brow product we've tried. Full review on this product will be coming up soon. 

Thank you all for keeping up with Exquisite Glow.

Alejandra  

Sunday, October 19, 2014

Exquisite Glow Update

Hi loves! Its been quite a while and we would like to give you loves an update on whats been going on. First of all we went on holiday the first week of October so we knew we were going to have to leave a few posts scheduled. We really wanted to stay on our three posts a week schedule so we set that up. During our holidays we like to stay off our phones and disconnect in order to have that tranquil feeling of actual relaxation. However we cheated just a tad and checked Exquisite Glow on Wednesday during our weeks holiday and found that Mondays post never went up nor Wednesday's post! So we had a momentary Nene Leaks moment and figured what the heck we will deal with this when we get back.


When we got back to Exquisite Glow Headquarters (aka my upstairs room) we came back to no INTERNET. We contacted our service providers tech support and got no where fast. So we scheduled for someone to come out and have a look.

If that was not enough our iPhone 6+ pre-order somehow goofed up our current phone service. Since then our phones have been freezing, lacking Internet service, and not updating. We were able to send a tweet here 'n there and like a few pictures on our Instagram account but that's bout it.


Thankfully we were able to sort things out with our providers and things are working again properly. So we should be back on our normal schedule this week. As to the posts that were scheduled previously we will still share them with you so don't worry. We are so happy that we are back and rolling.

On a side note, we have been obsessed with the Real Housewives of Atlanta, hence Nene Leaks.
She has the most hilarious facial expressions and we can't get enough. The show is so entertaining and we are pumped for the upcoming season. We know we know its not exactly mind enhancing TV but we all want a little bit of drama in our lives so why not get that fix via TV entertainment? Who else shares our little guilty pleasure? Tell us what shows your loving in the comments below.

To end this post we want to share a few more of our Nene Leaks GIFs, enjoy.


For more Nene Leaks GIFs click here.

Wednesday, October 1, 2014

Love, October | EXQUISITE GLOW October 2014

We have been waiting all year for October. Fall is officially our favorite season here at Exquisite Glow. Burning candles in the office, making Starbucks coffee runs, bundling up with our favorite scarfs and sweaters oh and did we mention Holiday makeup? We feel like the fall season is when we really get to play around with makeup by applying the whole nine yards. Makeup in the summer is more about keeping it light because we worry about it sliding off. During the colder months we can layer the concealer foundation blushes setting sprays and our eye makeup tends to last and stay in place. So yes we LOVE October, hello fall weather xo.

Today we want to continue with the monthly EG Monthly Magazine Cover idea because last months cover posts went so well. We got so many great responses to our content via comments and Twitter including some nominations so figured our lovely readers liked our idea. If you are new to Exquisite Glow see our Exquisite Glow on a Magazine Cover!?| EXQUISITE GLOW September 2014 post for more about the cover idea. 

The October Cover features ❤︎ Five Fridays Five top Favorites, because October carries five Fridays this year we thought it would be neat to share via post Five top Beauty or Fashion related favorites. We love to see beauty favorites on other blogs so we know we will enjoy writing up a storm every Friday! Other Featured posts to keep an eye out for (in no particular order) are:

❤︎ Shape your Eyebrows in 5 Steps
❤︎ Grow Back Those Nails Girl!
❤︎ Hair Care Products For Winter
❤︎ Concealer How To

We appreciate all your lovely comments and support with this new blog Exquisite Glow. We only hope to that we can continue to deliver content that you enjoy reading and helps you make product decisions or helps you learn something new. 

-Exquisite Glow


Monday, September 29, 2014

Seven Days Of Makeup Using One Palette | Anastasia Beverly Hills


I was so excited when I found out that the extremely talented Amrezy was working with Anastasia Beverly Hills to launch her own eyeshadow palette. I knew that I would have to buy the palette because first of all I wanted to support her and her success and second I've always been interested in trying out Anastasia's shadow palettes. So obviously this was the perfect opportunity for me to show my support and test out the quality of their shadows.

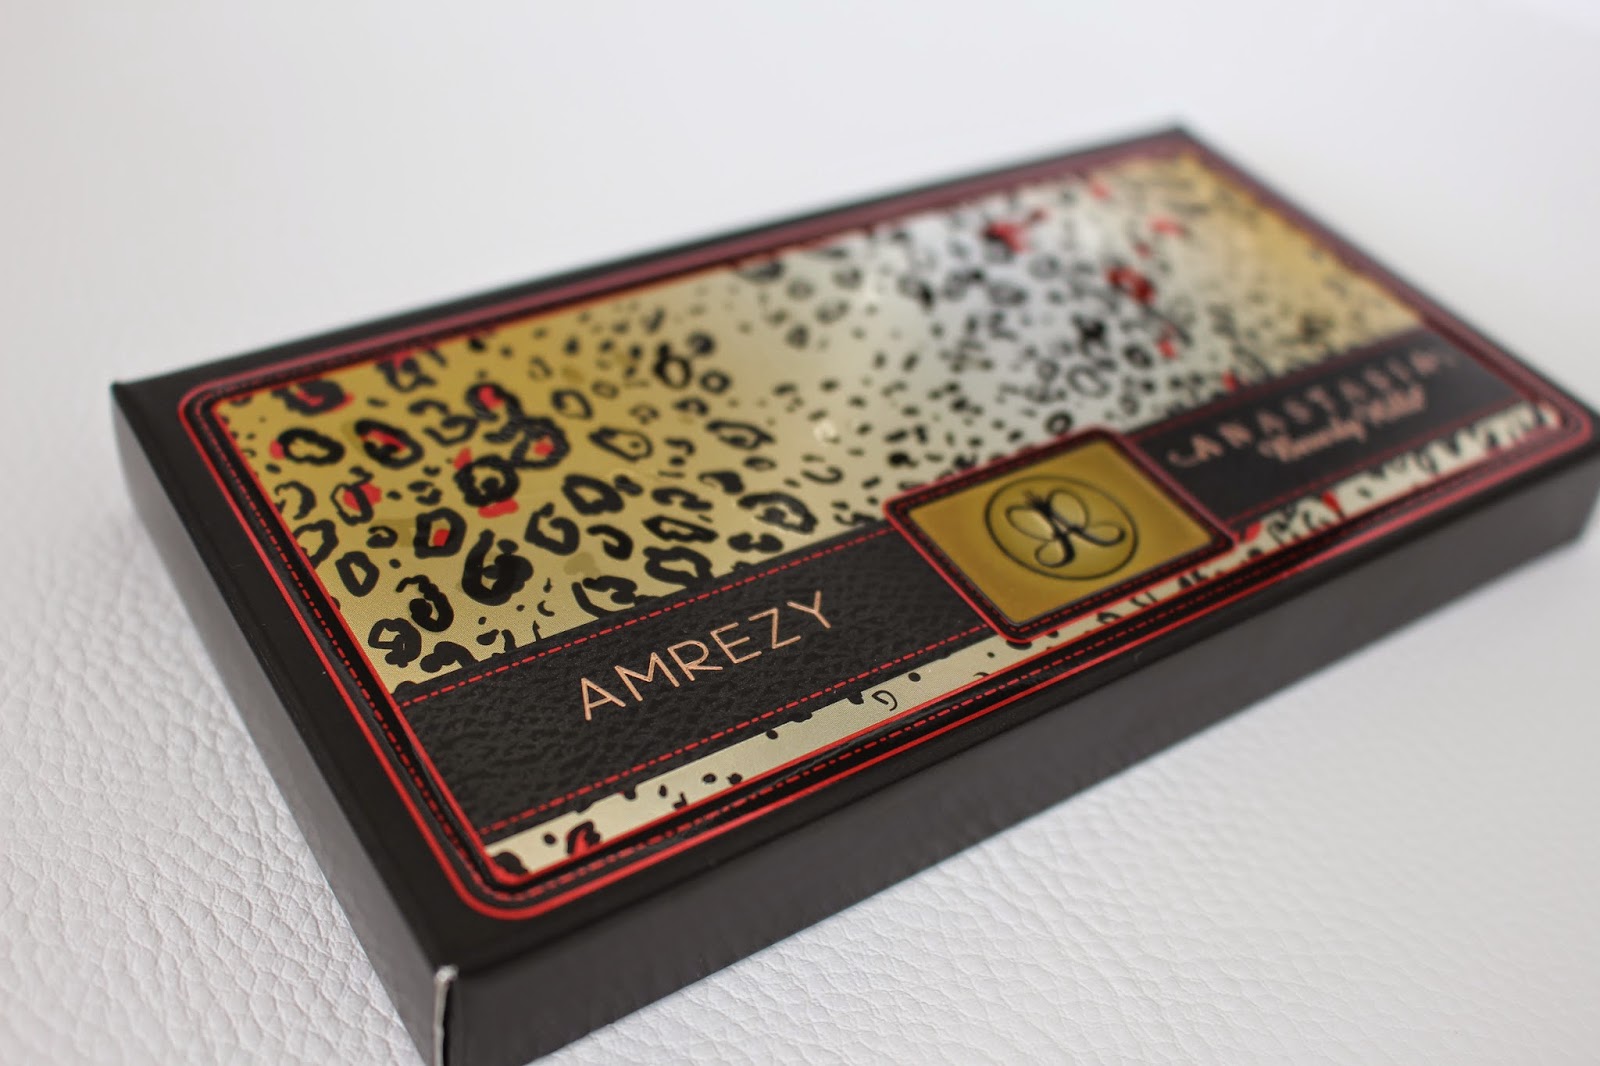
The picture above is a shot of the palette packaging, it is so gorgeous! Have I ever mentioned that I love leopard print? The edges are a nice gold however the actual palette inside is not the same. The edges are more of a silver bronzy as you can see the palette below is not the same as the packing sleeve. I do love how Amrezy's name is incorporated on the palette.


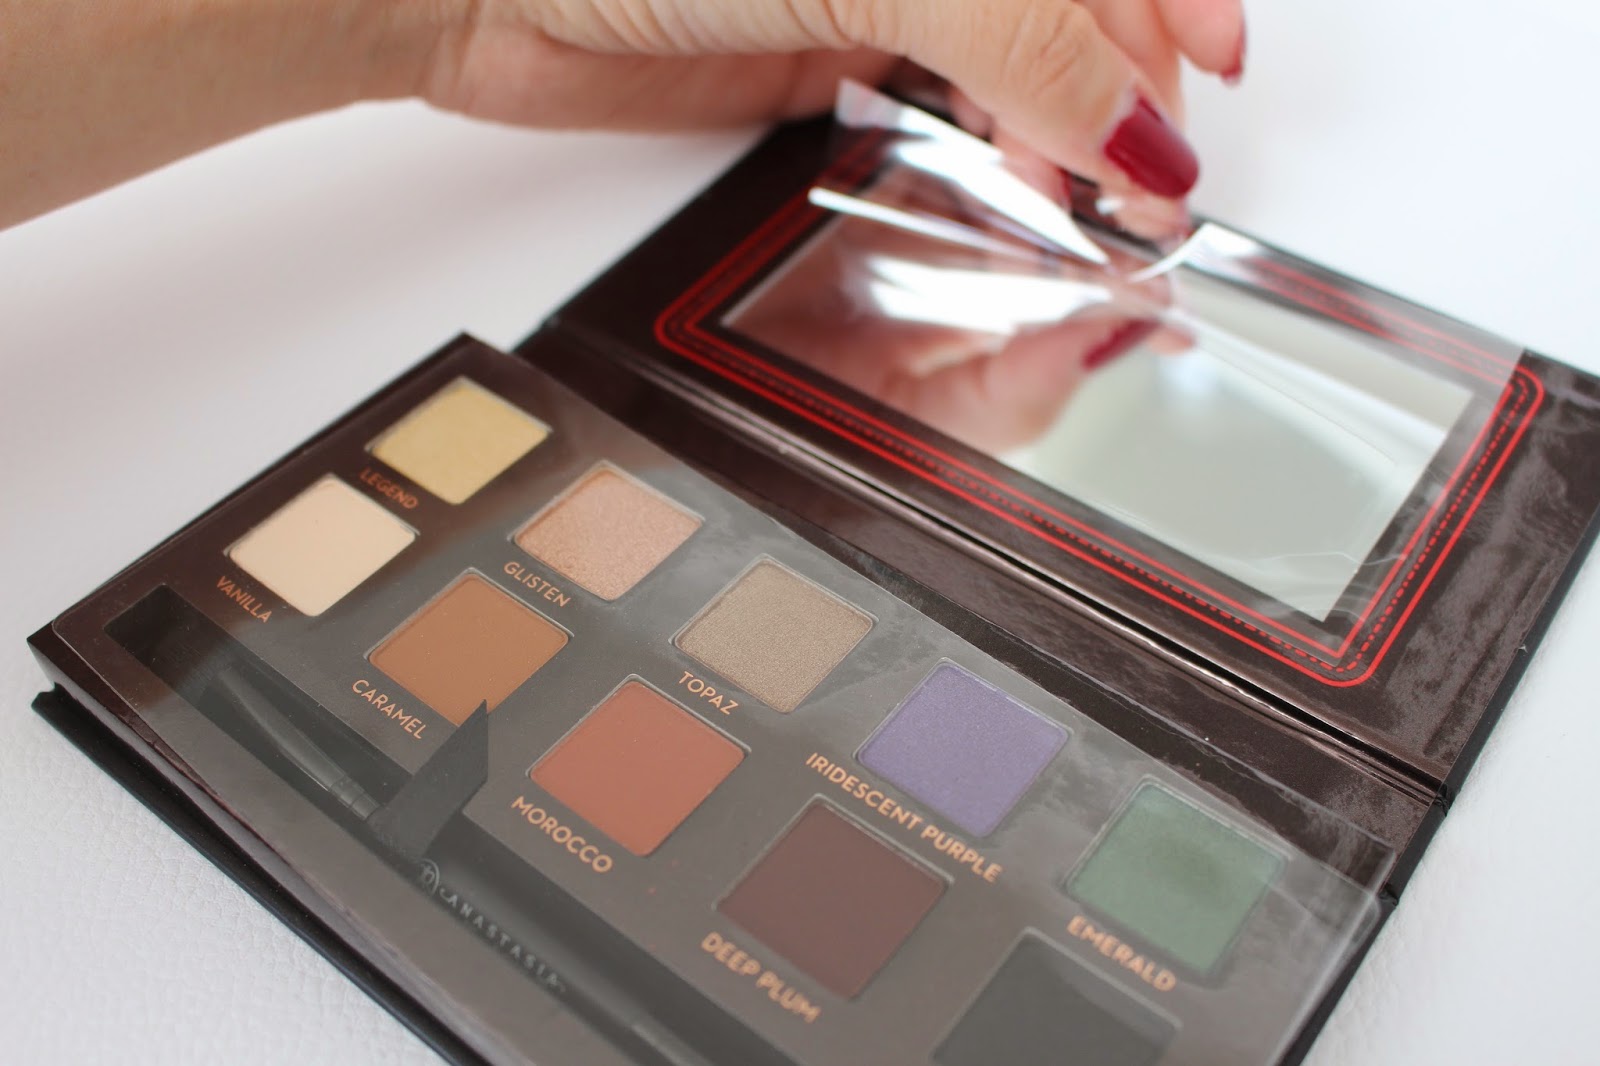
The inside of the palette carries a mirror on the top and has a protective plastic over it. The mirror is real good quality not like others I have seen in other palettes. I personally keep the plastic over it because I don't use it and I don't want it getting dirty. Is that weird? Does anyone else do that with palettes? Anyway because it does have a nice mirror this is a nice palette to take with you when you travel.


Legend is a frosty yellow toned shade that is light enough for the tear duct area and can double as a highlight. Glisten is a shimmery peachy color perfect for the lid. Topaz is a gorgeous bronze for the lid and crease however I'm not exactly sure why they named it Topaz. Iridescent Purple is just that an Iridescent Purple and the best thing of all the purple does not irritate my eye (usually purple shadows make my eye whites red). Emerald is the perfect Forrest green and looks great on green eyes. Vanilla is a nice shade for the lid, brow bone, and inner tear duct. Camel is warm matte orange brown and and looks great in the crease as a transition color and in the lower lash line to ground your looks. Morocco is has more a brick red-orange tone that helps to darken the crease. Deep Plum swatches a bit blotchy but it works just fine when applied with a brush, looks great as a smokey eye. LBD is an OK black, it swatches just fine but I do have to say that the palette could do without it.

The Amrezy palette also comes with a dual ended brush which is so helpful. One side is small and fluffy perfect for concentrating color in the crease and lower lash line. The other side a larger shader brush which can double as a blending brush.


The following images are looks I created using the palette. Let me know which one or ones you like best. 


1. Emerald on the Lid. 
2. Topaz in the Crease and lower lash line.
3. Vanilla in the Inner Tear Duct
4. Maybelline Line Stiletto liquid liner for the wing.
5. Loreal Voluminous Million Lashes mascara on the lashes. 
6. Anastasia Beverly Hills Dipbrow Pomade in Chocolate and Blonde.


1. Glisten on the inner lid. Topaz in the otter v and lower lash line with a mix of caramel and vanilla as the transition shade. Vanilla on the brow bone and legend on the tear duct. 
3. Maybelline Line Stiletto Liquid Liner for the wing and Loreal Voluminous Smoldering Eyeliner on the waterline.
4. J.Cat Eye Lashes, style EL600
5. Anastasia Beverly Hills Dipbrow Pomade in Chocolate and Blonde.
6. MAC Cremednude lipstick and NYX Cremebrulee Butter Gloss.


1. Iridescent Purple on the inner lid and lower lash line, Vanilla in the center of the lid, and Iridescent Purple mixed with Deep Plum on the outer V. Used Vanilla on the brow bone.
2. Maybelline Line Stiletto Liquid Liner for the wing and Loreal Voluminous Smoldering Eyeliner on the waterline and Loreal Voluminous Million Lashes mascara on the lashes
3. Eylure London Katy Perry Lashes in the style Punk Princess.
4. Anastasia Beverly Hills Dipbrow Pomade in Chocolate and Blonde.
 5. Lime Crime Lipstick in D'lilac


1. Glisten in the inner lid, Emerald on the center and Iridescent Purple on the outer V and lower lash line.  
2.Loreal Voluminous Million Lashes mascara on the lashes.
3. Anastasia Beverly Hills Dipbrow Pomade in Chocolate and Blonde.
(simple shadow look)
4. Lime Crime Lipstick in Babette.


1. Mixed Topaz and LBD for the lid. Morocco in the crease and right above. Then Concentrated Deep Plum in the crease to deepen the look. Mixed Topaz and Deep Plum for the lower lash line.
2. Loreal Voluminous Million Lashes mascara on the lashes.
3. Loreal Lipstick in Fairest Nude (one of my favorite everyday lipsticks)


1. Vanilla on the lid with Deep Plum in blended into the crease and just above to give it a smokey look. Then concentrated Deep plum in the crease and lower lash line to tie the look together. Legend on the Inner Tear Duct.
2. Maybelline Line Stiletto Liquid Liner for the wing and Loreal Voluminous Smoldering Eyeliner on the waterline and Loreal Voluminous Million Lashes mascara on the lashes.
3. Eylure London Katy Perry Lashes in the style Punk Princess.
4. Lime Crime Lipstick in airborne Unicorn with Maybelline's Lipstick in Espresso Exposed on the outer corners of the lips to darken them.


1. Emerald on the lid. Legend mixed with topaz on the crease. Used Deep Plum as a soft liner on the upper and lower lash line. As a highlight I used Legend in the inner tear duct.
2. Eylure London Katy Perry Lashes in the style Punk Princess.
3. Loreal Voluminous Million Lashes mascara on the lower lashes
4. Milani Lipstick in 07 Best Red. 
(this one feels like Christmas)

We hope that you enjoyed this post, and if you liked the looks that were featured here make sure to follow Exquisite Glow on Instagram. We post these type of how to looks there. What other palettes would you like to see looks for? Let us know xo.

-Alejandra 

Wednesday, September 24, 2014

Un Clutter Your Vanity Fast! | How to Organize


Turn an ugly looking makeup mess to a eye-catching collection by organizing your makeup using acrylic organizers. Lets go into How To Organize your makeup. My makeup collection has grown significantly, it went from one Caboodle case to a Ikea Alex drawer quick. However having more drawers to fill just allowed for all my products to be lost, overlooked and just PLAIN. A. MESS! I started looking online for acrylic organizers but found the prices to be pretty steep so I decided I could do with out them. On a trip to TJ Max I browsed through the home department and found a few items that I am just fell in love with. 


This little three drawer organizer was the first piece I spotted. Now why would I want more drawers when I have the Alex drawer? Well, first of all its clear and can house items I want to use on the daily without me having to hunt for them. It is also the perfect size for it to sit on top of my vanity without it taking away from the space, and for $14.99 I feel like this cute organizer is a steal.


Here is a side view of the drawers. The compartments are long enough to store mascaras, lip glosses and blushes. One thing that I did feel like I had to add was little rubber legs (shown in the picture below) I added these because the organizer is so light that it would move when ever the drawers are being opened and closed. Another thing I liked about this piece is that its going to be easy to clean and we know makeup can be messy. 


The other amazing find at TJMax was this acrylic lipstick holder. This was such a great addition to my storage because I was at a point where I truly needed to display my collection and keep my lipsticks organized so I know what I have. Also I feel that this way I will get more use out of my lipsticks if they are out on my vanity, there is a better chance for me to pick a different shade every day giving them all equal love.


This lipstick organizer holds a total of 36 lipsticks, and I loved it so much that I purchased two of these organizers for $11.99 each! I purchased a second one because I DEFINITELY see my lipstick collection growing some more and I want to be prepared. I have officially become a lip product addict, and as a matter of fact I'm waiting on an order to be delivered today ;)  I also seen on Instagram this morning a new collection just launched by L'OrĂ©al called Collection Exclusive and I already have my eyeballs on that! So there you go, Hello second Lipstick Holder!LOL


I love the fact that the Lipstick holder is tiered and allows for all my lipsticks be seen and nicely displayed without them hiding one behind the other. However there are some lipstick holders in the market Ive seen without the tiers that are PERFECT to store lipsticks INSIDE my Ikea Alex drawers. These particular holders sit nicely in the drawer and allow them to open without the lipsticks getting stuck. 


This organizer I found at Home Goods and I thought it was the perfect addition for the top of the three drawer organizer. This one I have to say was expensive for what it can really hold, but it was an impulse buy. So here it is, it ran for $13.99


As you can see in the picture above this organizer has the space to set your larger items on the left and stand a few liners and lipsticks on the right. This is a real nice starter piece for young girls who are starting out with makeup. *Warning: Purchasing these sets can cause you to go a little cray cray and lead you to a makeup collection extravaganza! (You've. Been. Warned) 


These other three organizers I found were at TJ MAX by Madesmart Housewares. These here I thought would be the perfect organizer bins to hold my single blushes.  They are 14x4 bins and they fit perfectly in my Ikea Alex Drawers side by side.


What's neat about these bins is the rubber base, it makes it so that the blushes stay in place which is a big help. Unfortunately they did not have all three bins in the same color so I had to take what was available. At $3.99 I could not leave these behind and pass them up. Another plus about these are the little rubber legs under the bins shown in the picture below. They are a major help in keeping the bins from shifting in the drawer as shown in the image below.


The last organizer tray I want to share with you is this one I found at Walmart for $6.00 This tray has six compartments and is so helpful for separating your products. Its stupid affordable and perfect for the Ikea Alex drawers however it does float because the edges hang on the sides of the drawer. I like that but I opt to use it in my long vanity drawer. I have to say that this one does scratch easily but because it is put way I don't mind that much. The material is a more thin type of plastic and are not handled with care at the store. The price for it makes up for it, but I do have to add that if you drop this on a hard surface its possible that it will crack. Below is how I use this organizer.


That's it loves this is how I un-cluttered my drawers and made my self more organized. I hope that I've inspired you to clean up your mess and give your beautiful makeup a showcase worthy spot in your room.  I listed where I purchased my pieces and gave you ideas of storage for cheap while still looking expensive. Another item I put on top of my vanity is my makeup brushes. I purchased a glass rectangular vase from Ross and filled it with plastic pebbles from Michaels craft stores and stuck my brushes in there as a beautiful display. Of course they look extra beautiful when they are clean. Get a look at it, I featured it in my Six Must Have Makeup Brushes post see it here

Thank you for sticking to the end of this long post, but I really wanted to share this one with you all. We are coming upon the end of September and I'm planning posts for October now. Is there anything in particular that you would like to see? Let me know in the comments below. If you want to keep up with Exquisite Glow on a more daily biases see our social media Links in the follow tab above. Again thank you for your comments and support they mean a lot to me as a new beauty blogger with Exquisite Glow.

-Alejandra